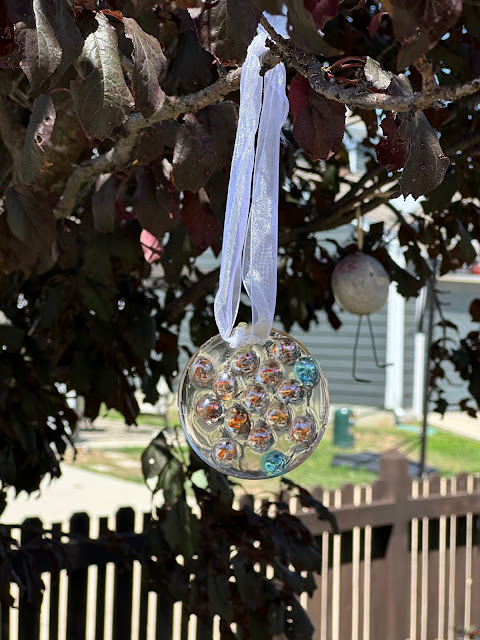
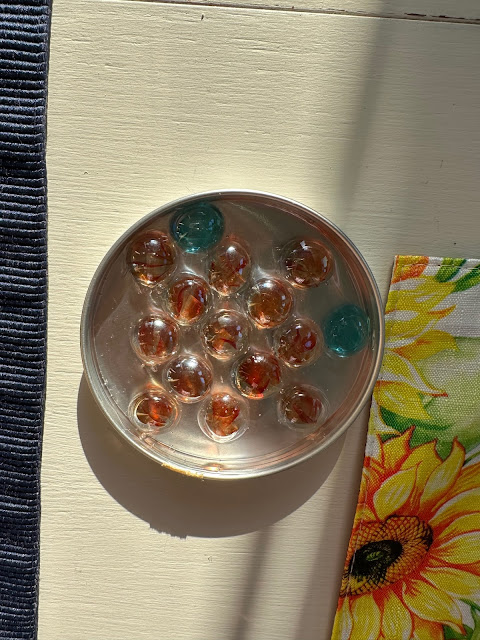
These adorable suncatchers are the perfect summer craft, and they are easy! This is a fun project to do with school-aged children who are needing to stay busy while school is out. These make adorable Christmas ornaments as well. Welcome to the August edition of Sustainable Crafts: 🌞 Sunshine!
DIY Resin Suncatchers
There are actually two ways that I made these suncatchers: one using clear Elmer's type glue and the second using UV Resin. Elmer's glue is cheaper but takes 4-5 days drying time. The UV Resin costs more but the drying time is considerably shorter: about 15-20 minutes. Since I have absolutely little patience, I decided to show you the UV Resin suncatchers in this post.
Tips for Making Suncatchers
1. It's best to use flexible plastic for the molds. Lids from sour cream, yogurt, and similar products work great.
2. Make your design first, work out the errors, then remove the design from the lid. Now you can start adding the resin into the lid and recreate your design in the resin.
3. Save your lids when you are done. They can be reused a couple of times!
Materials for Making Suncatchers
1. UV Resin
4. Recycled lids from food containers, cleaned and dried
5. Twine or ribbon
6. Hot glue gun
Steps for Making Suncatchers
1. Using a clean and dry lid, squeeze or pour the resin into the lid, a thin layer just to hold the stones in place.
2. Place your stones into the resin quickly as it will begin to firm up immediately. This is why you want to do your design in advance!
3. Squeeze resin on top of the stones, covering them completely. The resin does not have to encase the stones, just cover enough to make the stones stay firmly in the suncatcher.
4. Let dry for 20+ minutes in the sun. After 20 minutes, touch the surface. If it is still sticky, continue to dry.
5. Once the resin is dry, remove it from the mold by bending the plastic lid back and away from the suncatcher. Do this slowly so as to not break the suncatcher.
6. If the suncatcher still isn't thoroughly dry, then lay the suncatcher wet side up on a piece of nonstick aluminum foil and continue to dry overnight.
7. Finish your suncatcher by hot gluing a ribbon or piece of twine on one side of the suncatcher. Hang in a sunny spot to get the full effect.
Related: Homemade 3 Ingredient Fudgesicles
🌞 Check out these other amazing craft ideas with the theme of Sunshine! 🌞
🌞 Julie at Sum of their Stories made Sunburst Greeting Card idea made with Old Magazines
🌞 Gail at Purple Hues and Me made Sun Painting Bandana DIY
🌞 Stephanie at Crazylittlelovebirds made Faux Stained Glass Using Plastic Plates
🌞 Allyson at Southern Sunflowers made Sunburst Artwork using Paper DIY
🌞 Christine at Christine's Crafts made Easy Button Flowers for Home Decor
🌞 Niki at Life as a LEO Wife made Box Full of Sunshine Idea with Free Printables


These resin suncatchers turned out great! I have a few lids and the flat bottom glass marbles as well. I would just need to get the resin. I'm going to have my girls create these. I think these would be so pretty hanging out near my pergola. The resin suncatchers plus the morning sunlight in that area would be perfect. Thank you for sharing your tutorial with us.
ReplyDelete-Stephanie@crazylittlelovebirds.blogspot.com
These are so pretty. I can’t believe how easy that are to make. Thank you for sharing!
ReplyDeleteWow, Terri! Your sun catcher turned out really pretty hanging in the sun! They would make beautiful gifts - they are so easy to customize to fit the occasion! I have never used resin, but you have inspired me to try it! Thanks for sharing!
ReplyDeleteThis looks like such a fun summer project. That resin looks great too, I've seen the more complicated ones where you have to do a lot of measuring and mixing but this looks so easy.
ReplyDeleteWhat an awesome suncatcher! I like that you added a pretty ribbon as a hanger. Working with resin is on my long list of crafts to try. I never thought of using a household item like the lids as a mold ~ good to know.
ReplyDeleteThese are so cute! I've never done a resin project, and this looks like an easy way to start. I would've never thought that using a metal lid was possible. I thought you had to buy those specific silicone molds because the resin would stick to other surfaces. Thanks for saving me money on that when I try using resin!! It's great hopping with you! Pinned!
ReplyDeleteNiki | Life as a LEO Wife
It's so cute, it looks like a clear candy and you made it look so easy!
ReplyDelete